
After you've designed your survey, you will need to set up the survey settings before you can launch.
If you are not already in your survey settings page, click on the settings wheel next to your survey name to get started. There are six setting sections that need to be reviewed and/or set up.
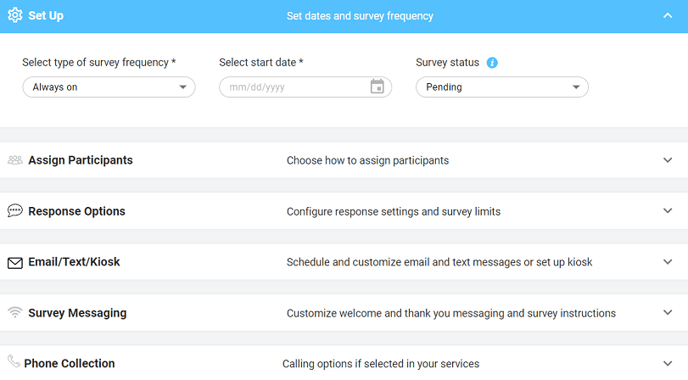
The set up section is where you will define your survey frequency and open/close dates. Choose what type of survey frequency you need (point in time, always on, pulse) and select it from the first dropdown menu. Based on your selection, additional fields will appear. Any field with an asterisk * is required.
-
Point in time surveys are for any on demand survey with a specific start and end date for data collection such as with engagement, well-being, or diversity and inclusion surveys.
-
Always on surveys do not require an end date and therefore are always open to collect data and are common for employee lifecycle surveys such as onboarding, new hire, or exit.
-
Pulse surveys are designed to be sent to the same group of individuals at a regular cadence. For example, you can create a pulse survey for people to take every month and monitor changes in feedback.

Assign participants is where you will select the method for how participants will be assigned to your surveys. There are three options available when assigning your survey to your people; automatic triggers, manually assign participants, and anonymous.
-
Automatic triggers allows you to create rules (i.e. trigger events) to automatically assign your survey to participants based on custom criteria you set up. The platform looks daily for participants who meet the rules/requirements of the trigger events set up in the survey settings. This is our best practice approach for always on and pulse surveys.
-
Manually assign participants is the default option for choosing who receives your survey. With this option, you will assign the survey to participants in the PEOPLE Tab. To learn more about manually assigning participants to a survey, see our help article here.
-
If you prefer to create an anonymous survey, select that option in the assign participants setting section. Additional fields will appear if anonymous is selected.
Assigning participants to a survey does not automatically send them a survey invitation. You must set up your survey notifications in the Email/Text/Kiosk setting for these to be sent.

Configure your response options and survey limits. This is an optional setting section that does not need to be modified for your survey to launch successfully.
-
Lock responses allows you to choose whether or not to allow participants to return to their survey after they have submitted it to view and/or edit their responses. By default, this option is turned off. If you prefer participants complete the survey in one sitting and not have the ability to return to it to add or edit their feedback, then you must click on the toggle button to turn it on.
-
Response window allows you to limit the length of time a participant can access their survey from the date they are assigned to the survey. Typically, this is only used if you are conducting an always on survey (e.g. new hire check-in or exit survey) and is not needed for point in time or pulse surveys.
-
Minimum data threshold allows you to apply different data thresholds for your surveys, allowing you the ability to run both confidential and non-confidential surveys, if desired. People Element can set your data threshold minimum option to a value that best suits your survey needs.
-
Display comments in native language for reports allows you to decide if your non-English comment responses should display in their native language or in English. This is only available if your survey is created in multiple languages.

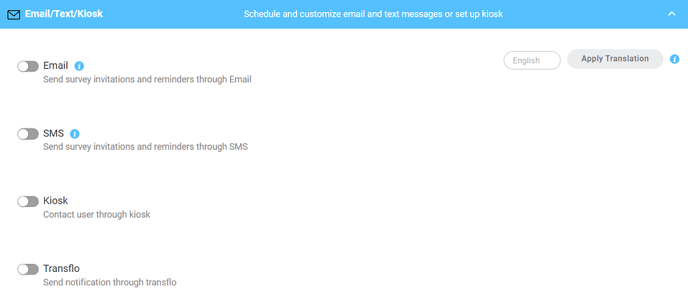
Identify the distribution method(s) for your survey (email, SMS, kiosk, Transflo), as well as schedule and edit your email and SMS (text) notifications. First, toggle on the distribution method(s) you want to use for your survey.
-
Email allows you to distribute your survey to those participants in your participant list with an email address. Emails are sent to addresses in the email and alt email columns.
-
SMS allows you to distribute your survey via text message to those participants in your participant list with a phone number that can receive text messages (i.e. cell phone). SMS is sent to phone numbers in the phone column only. (Employees may opt out of receiving these messages. To opt back in, they can text "START" to 720-650-7961.)
-
Kiosk is an option for employers that do not have access to participant email addresses or cell phone numbers, providing one common survey link for participants to enter a custom username and password to access their survey.
- Transflo allows you to send your survey via the Transflo mobile app. Survey links will be sent to the notification section of the app for each driver.
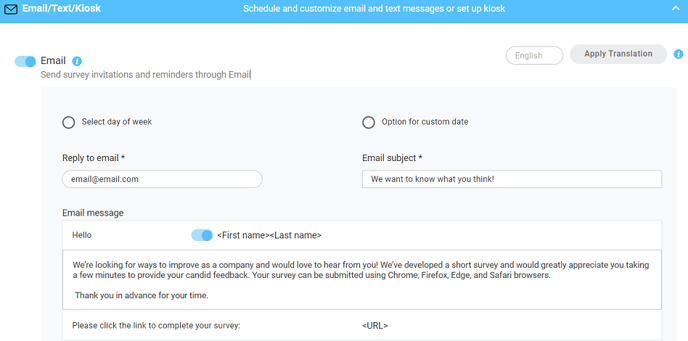
When selecting email and/or SMS as your distribution method(s), you will need to set up the frequency for your notifications by choosing a day of the week (select day of week) or custom dates (option for custom date).
-
Select day of the week allows you to send notifications weekly on the day you select (up to 4 times per participant). Select time also allows you to set the time of day the notifications will be sent. Best practice is to use this option when running an always on survey.
-
Option for custom date allows you to select multiple dates for notifications to be sent. Best practices is to use this option when running a point in time survey.
Survey reminders via email and SMS will be sent automatically from the system to anyone who has not completed at least 25% of the survey based on the dates and times selected. Once a survey is closed, all remaining notifications are cancelled. Although you have the option to select the time you want to messages to send; we cannot guarantee that all messages will go out at this time. If no selection is made, the system default is set to start sending notifications at 9am MST.
For email notifications, enter an email address where replies can be sent in the reply to email. Make sure the email entered is for someone who is knowledgeable about the survey and can answer any questions.
If you don’t want your participants name to display in the email/SMS message, you have the option to toggle this off (grey) next to first name last name of the email message. This will default to toggled on (blue).
Only click send now if you intend to send survey invitations now. This will send a notification in addition to any already scheduled.
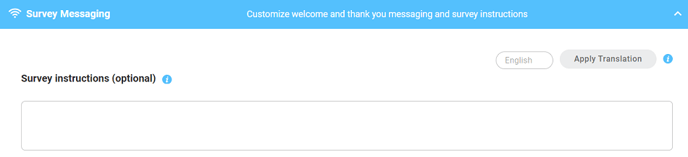
If you would like to include a description or purpose for your survey, you can add survey instructions which will appear in each participants’ online survey.
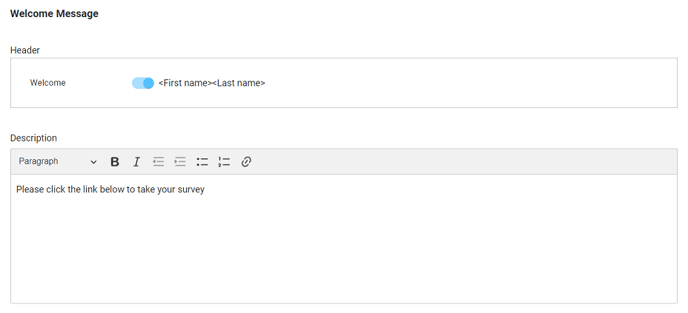
You can customize the welcome message that appears when participants click their survey link. If you don’t wish to display participants names on the welcome page, you can toggle this off (grey) by first name last name in the header. Default is toggled on (blue).
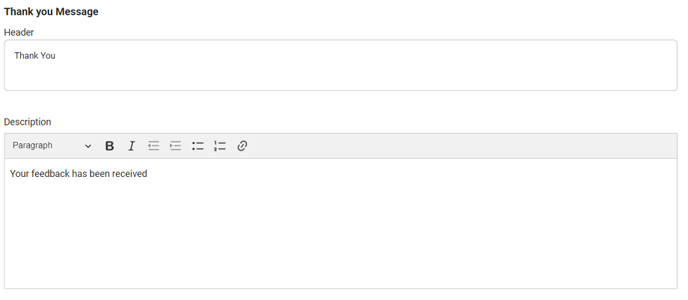
Lastly, you can customize a thank you message that will appear when a participant clicks the submit button at the end of their survey.
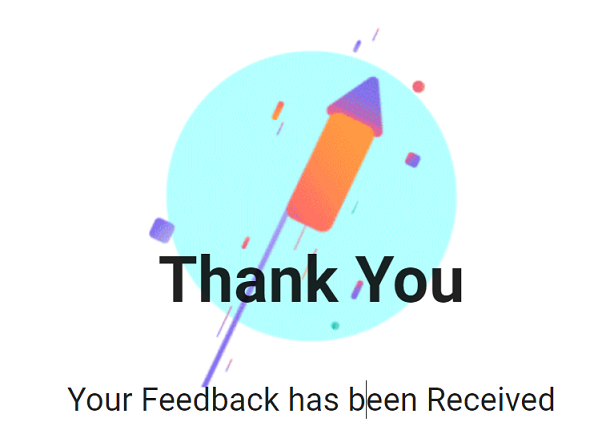
Please note the rocket graphic cannot be changed or removed.
If you would like our phone interviewers to call survey participants to collect feedback over the phone, please work with your People Element contact to set up this option as they have access to toggle this feature on for you.

Once you have finished customizing your survey options, click save to ensure all changes are saved before you leave the page.