![people element logooo.png]](https://20709424.hs-sites.com/hs-fs/hubfs/people%20element%20logooo.png?height=50&name=people%20element%20logooo.png)
Companies that have limited employee information such as email addresses or cell phone numbers, or a hard to reach population can benefit from the kiosk feature.
Setting up Kiosk
While selecting your survey settings, kiosk can be turned on in the email/text/kiosk section.

Toggle on kiosk and create your kiosk survey URL to customize your survey link. Most commonly, this is an abbreviated name of your company and survey name. As you type the kiosk survey name into the field, your full survey link is generated on the right-side of the screen. This is the weblink participants will use to access your survey. It’s case sensitive so be sure to share the exact link as displayed. Use the copy icon to easily share your survey weblink.
Creating Kiosk Login Credentials for Participants
When participants click on your survey kiosk weblink they will be prompted to enter login credentials. This allows survey responses to be tied to a unique person and their demographics. Go to the PEOPLE tab to create your participant credentials.
In the manage participants table, go to the options icon on the top right of the page and select column settings.
Check the boxes for kiosk survey username and kiosk survey password.
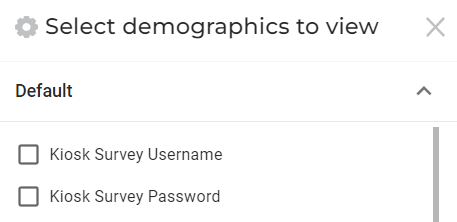
By default, the following will display as columns headers but you may see something different if these field names were changed for previous surveys run by your organization.

You will need to edit the name of these fields (if not already done) so they describe what information is needed. The name of these demographics will show up for survey participants when they click on the kiosk survey link.
To edit the names, go to set up demographics in the PEOPLE tab. Under the default group, scroll down to the kiosk fields and change the custom name.


Kiosk credentials must be unique to each survey participant
Kiosk login credentials to consider:
-
Payroll code
-
Last name
- Birth date
- Employee ID
Next, create an Excel file (.xlsx format) with the below 3 columns to upload your participant kiosk information in bulk.
-
Employee ID
-
Kiosk survey username (exact column name as shown in the platform)
-
Kiosk survey password (exact column name as shown in the platform)
See an example below of what the upload file could look like. Note that the column headers (row 1) must match exactly to the name of your Employee id and kiosk fields in the platform when you upload. You can always modify the kiosk field names for what you want to display on the login screen after you upload your participant information.
Upload your Excel file by clicking import on the manage participants page and selecting the document from your computer.

Here’s what a participant will see when they click on the kiosk weblink.

It’s time to share the kiosk weblink and provide instructions to participants for how to give feedback. Please see our survey communication templates for examples of emails you can send and flyers you can post letting people know how to participate.